blog
A New Workshop (Part 2)
May 22, 2010
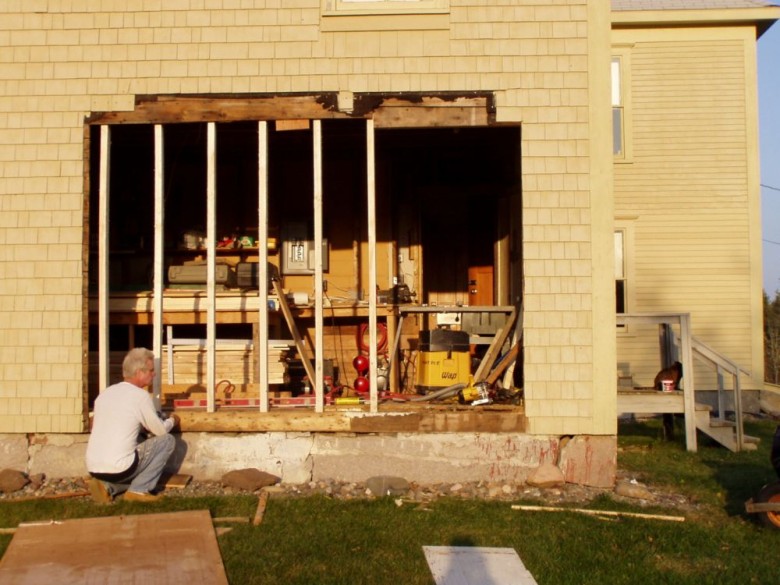
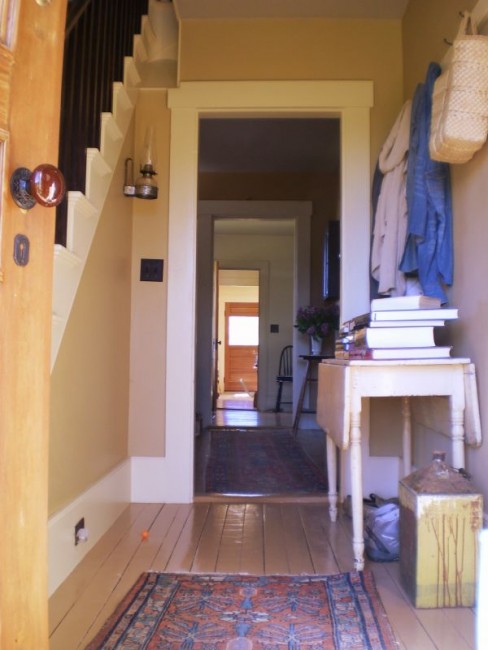
We have always been restoration purists at heart, so the first major decision in our workshop renovation, was a tough one - to reposition the original location of the exterior door from the center to the side (where a window had once been), to make the space more functional. This allowed us to create a "U" of cabinets and countertops and inadvertently gave us a 'shotgun' style hallway (through six doorways), from the front of the house to the back.
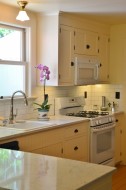
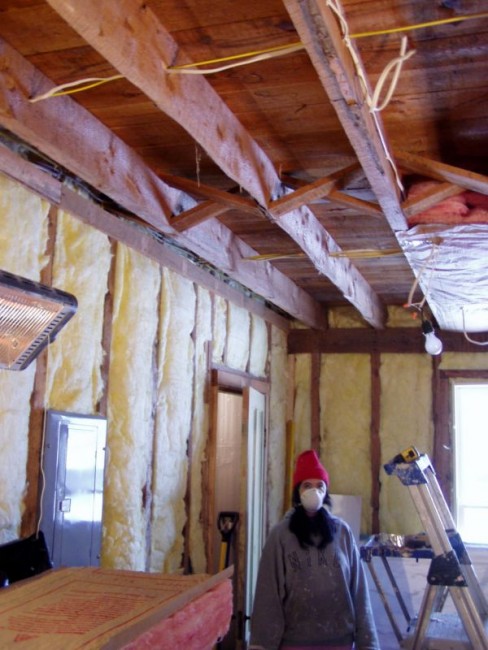
Scouring salvage yards for an appropriate 1930s wooden door- with no luck - we opted for a new one (36" wide) from the 'Depot' in a style that suited the era. A little stain, period moldings, a handmade wooden (board and batten) storm door and recycled antique hardware made it all work. Once the door was in place, we shingled our restructured back wall, insulated all four walls and the ceiling, and added a plastic vapor barrier; then sheetrock, spackle and paint (Cameo White). We kept the original strip fir pantry floor intact, adding 4 X 8, 3/4 inch, T & G Advantech to the rest. Commonly used for sheathing and subflooring, Advantech is made of wood chips and resin and is very tough (perfect for a shop). Four eight foot fluorescents provide much needed lighting - we could perform surgery back there now!
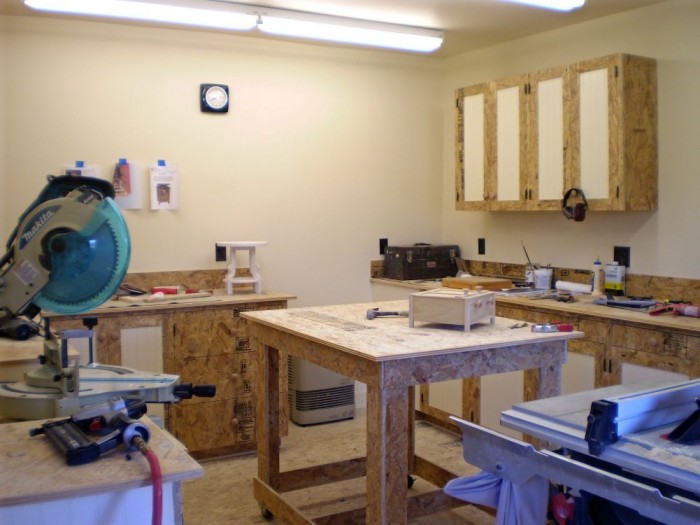
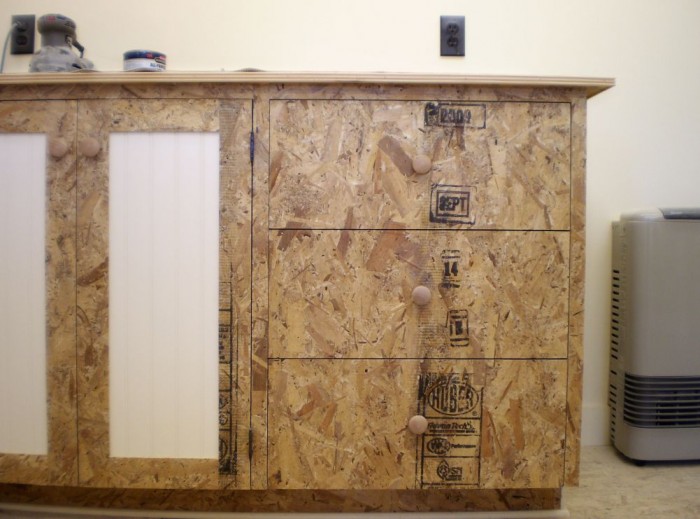
Phase II began this past winter. A small propane Rinnai heater was added making things nice and cozy - no more bundling up! New cabinetry was fashioned from the same material as the floor- 5/8" thick for the cabinets and doors, 1/2" for the drawers. It is cheaper than plywood, just as stable, but tougher and in our application better looking. We left it unfinished, incorporating the black, factory info stamp, included on every sheet as part of the design. For the sake of the budget, we used bead board paneling (painted Cameo White too) left over from our mudroom remodel for cabinet ends and door panels. Common screen molding serves as a protective, but decorative countertop edge.
We cantilevered our slide compound miter saw station for support, since I decided to buy the biggest and the baddest saw for versatility (Makita LS1214FL). Wall mounted magnetic strips keep tools off the bench, but make them readily available and easy to grab. A center island, work station (where much assembly is done), is on lockable wheels, can be rolled anywhere and doubles as an out-feed for the table saw. Our Bosch 4100 'hybrid' is accurate enough for cabinetry, but also on wheels with a collapsible stand, making it portable and easily moved for job site use. Dust collection and air filtration (an important health consideration) along with other shop 'must haves' are on their way.
A good looking space is a pleasure to work in. Our goal was to build cabinets that were inexpensive, functional, could stand a beating, but would not lack in style or elegance (smart, tough and pretty). The ruggedly handsome result creates an effect that is both contemporary and traditional. Eventually my dream - screened in porch - will be built off the back to take advantage of the great views of the apple orchard, perennial garden, fields & lake you now can see from the shop windows - but that's a story for another post.
(click photo to view larger image)
|
|
|
|
(comments = 0)
leave a comment

fineartistmade blog
A journal about home design, gardening, art & all things Maine. Read more...
- June 2025
- December 2022
- November 2022
- October 2022
- November 2021
- May 2020
- October 2019
- August 2019
- July 2019
- September 2018
- April 2018
- December 2017
- August 2017
- June 2017
- May 2017
- December 2016
- August 2016
- July 2016
- April 2016
- November 2015
- June 2015
- May 2015
- March 2015
- October 2014
- March 2014
- February 2014
- January 2014
- December 2013
- November 2013
- July 2013
- May 2013
- April 2013
- March 2013
- January 2013
- December 2012
- November 2012
- August 2012
- June 2012
- April 2012
- March 2012
- February 2012
- January 2012
- December 2011
- October 2011
- August 2011
- July 2011
- June 2011
- May 2011
- April 2011
- March 2011
- February 2011
- January 2011
- December 2010
- November 2010
- October 2010
- September 2010
- August 2010
- July 2010
- June 2010
- May 2010
- My Scandinavian Home
- Daytonian in Manhattan
- {frolic!}
- I Married An Irish Farmer
- Smitten Kitchen
- The Curated House
- even*cleveland
- Mary Swenson | a scrapbook
- Ill Seen, Ill Said
- Gross & Daley Photography
- Remodelista
- Abby Goes Design Scouting
- Mint
- the marion house book
- 3191 Miles Apart
- Svatava
- Katy Elliott
- Poppytalk
- Kiosk
- decor8
- KBCULTURE
- Lari Washburn