blog
Trim
June 19, 2010
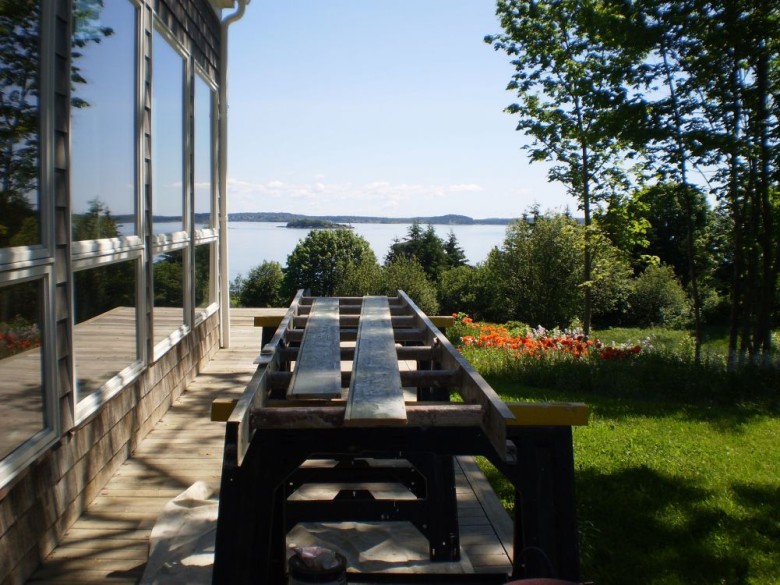
Working on old houses requires a lot of 'creative carpentry.' There are no rules, only better ways. These have to be determined. There is much to take into account and a good deal to consider.
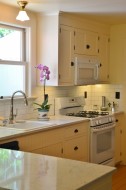
Beneath two subsequent kitchen renovations, the original hand-planed baseboard and chair rail had survived. It was difficult to remove them from the positions they had occupied for so many years, but this was not a museum restoration - this was somebody's summer home. The goal was to create a comfortable modern kitchen that preserved the 'spirit' of the old room.
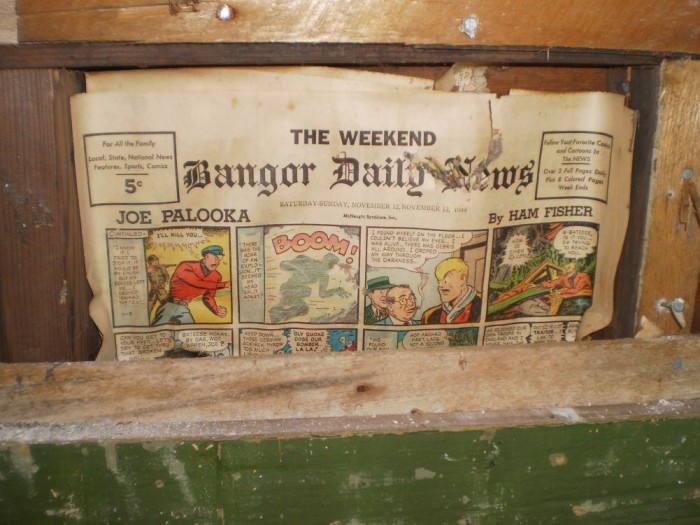
It is a good idea to save and repurpose material wherever possible. Even if used in new locations it will preserve history and provide authenticity. In the 1949 renovation (a date verified by 'the Sunday comics' found in the wall), two original 'six over six' windows were replaced with casements. These were upgraded again with the double insulated variety about five years ago. We would have loved to see the old six over six make their return (a stack had actually survived in the basement), but the casements really work better with modern countertops and they provide a clear unfettered view. The solution was to dress them up with traditional moldings, based on others in the room.
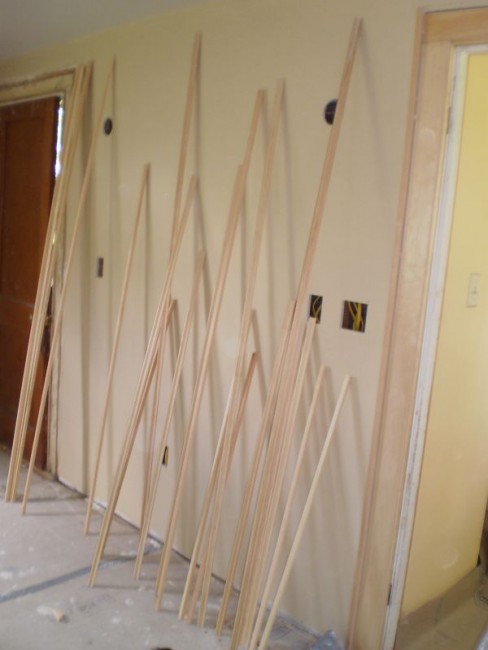
Moldings can be recreated with shapers, routers or by a custom cut knife in a molding shop. Antique hand planes can also get job done. A few dollars were saved in this restoration, by taking stock edge molding from the lumber yard and altering it with table saw and sandpaper. In the case of the windows, the trim was cut to 1/4 inch thick, to bring it closer to flush with the wall - simulating the way it was done in lath and plaster days. Some of the early beaded chair rail was cut to 3/8 inch thick and reused as apron while old window stops (found in the basement) were also incorporated. Some of the 'tweaked' edge molding completed the look. The rest of the chair rail and baseboard will be put back in original locations after the new cabinets are in place.
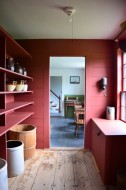
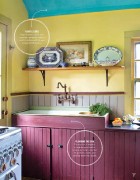
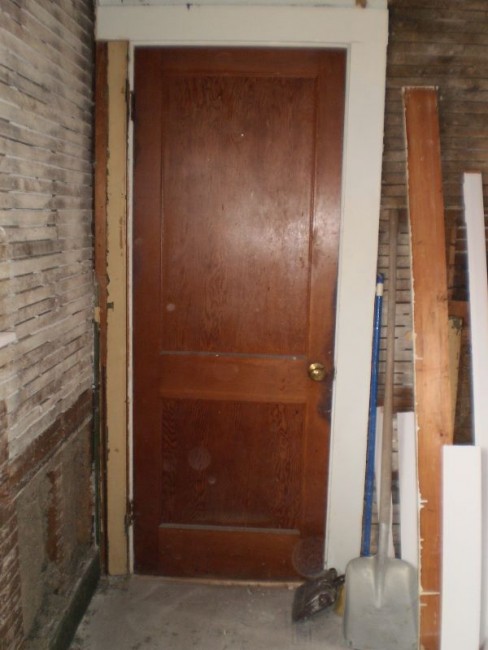
One of the homeowner's wishes was to replace a 40's era pantry door with one from a stack of very old doors in the basement. These were original doors (casualties of previous renovations) that had been removed from their early locations many years ago. We were pleasantly surprised to discover when we began poking around our 'modern' replacement that its frame was built 'inside' an earlier incarnation, with new trim added on top. Peeling away this later addition revealed the original door frame and beaded trim flush with the plaster wall. Only its 'ogee' edge molding had gone missing.
In the current renovation the 'gypsum' was laid flush with that door frame - side by side - as the plaster had been. Opposite (past the old fireplace), the 'modern' door frame was cut back with a razor knife and a good sharp chisel so it was flush with the studs. The sheetrock was cut back about four inches around the doorframe, leaving room for a half inch thick trim (with a bead cut with a router so it would match its older sister), that was installed - also flush with the finished wall. Both these doorframes were finished with more of the adjusted stock edge molding, overlapping the sheetrock to conceal the wall board's rough cut edge.
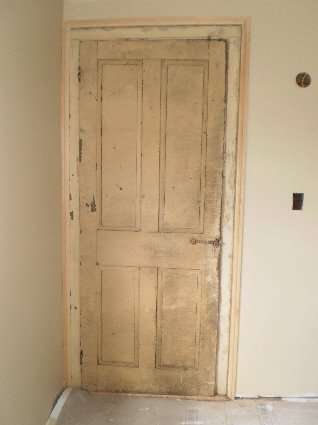
There was one last thing to do that day, before going home. We headed down to the dank Eastport basement and began flipping through the stack of old doors. All of the doors in the ell were four panel - mortise and tenon; held together not with glue, but wooden pins. The typical door was opened and closed with a thumb latch. While examining the doors carefully, one caught our eye. It just looked right and measured right as well. We hauled the grimy 'survivor' up the cellar stairs and popped it into place. The hinges matched right up - as did the paint (including its earliest layers). It was a perfect fit. It was the door that had once occupied that place. A few weeks to reacclimate from its damp and dreary prior existence and it will be back on its feet again - back where it belongs.
(click photo to view larger image)
|
|
|
|
(comments = 0)
leave a comment

fineartistmade blog
A journal about home design, gardening, art & all things Maine. Read more...
- December 2022
- November 2022
- October 2022
- November 2021
- May 2020
- October 2019
- August 2019
- July 2019
- September 2018
- April 2018
- December 2017
- August 2017
- June 2017
- May 2017
- December 2016
- August 2016
- July 2016
- April 2016
- November 2015
- June 2015
- May 2015
- March 2015
- October 2014
- March 2014
- February 2014
- January 2014
- December 2013
- November 2013
- July 2013
- May 2013
- April 2013
- March 2013
- January 2013
- December 2012
- November 2012
- August 2012
- June 2012
- April 2012
- March 2012
- February 2012
- January 2012
- December 2011
- October 2011
- August 2011
- July 2011
- June 2011
- May 2011
- April 2011
- March 2011
- February 2011
- January 2011
- December 2010
- November 2010
- October 2010
- September 2010
- August 2010
- July 2010
- June 2010
- May 2010
- My Scandinavian Home
- Daytonian in Manhattan
- {frolic!}
- I Married An Irish Farmer
- Smitten Kitchen
- The Curated House
- even*cleveland
- Mary Swenson | a scrapbook
- Ill Seen, Ill Said
- Gross & Daley Photography
- Remodelista
- Abby Goes Design Scouting
- Mint
- the marion house book
- 3191 Miles Apart
- Svatava
- Katy Elliott
- Poppytalk
- Kiosk
- decor8
- KBCULTURE
- Lari Washburn