blog
Remnants from the Attic (part 2)
February 18, 2012
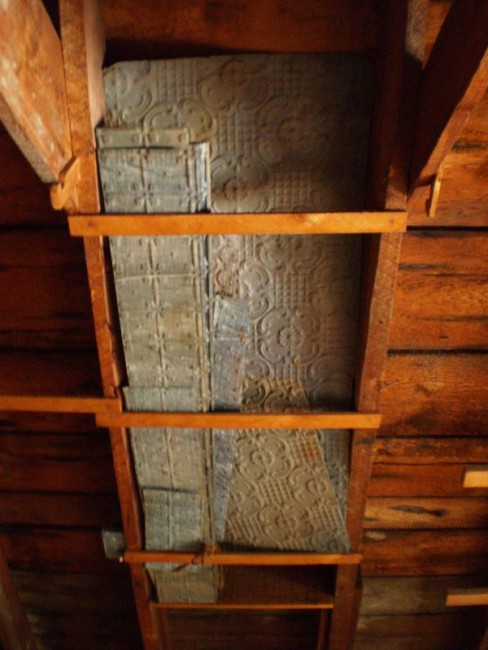
We can never resist an invitation to tour an antique basement or attic. Luckily for our project, the original installers of our Queen Anne's tin ceilings a century ago, had taken the leftover scraps and secured them for safekeeping. We spied them in the attic during our initial walk through - tucked neatly into the rafters. These early homeowners could have chucked them in the 'dumpster,' but instead, stashed them away for that someday, when they might be useful. Little did they know, someday would come some 100 years later.
There were hunks from the bathroom, dining room and kitchen. We found the exact cut out from the field in the kitchen which was kind of remarkable to see. There were large pieces of the garland which we definitely needed, but not enough of the filler that makes up the difference between the garland and the wall.
What there was - was more than enough of the filler pattern used in the dining room. There were many strips of this handsome 'grid' (already pre-cut and much better looking than the bubble) with several large sheets perfect to fill the space over the stove and sink. Another advantage; using the same border would further tie the two rooms together.
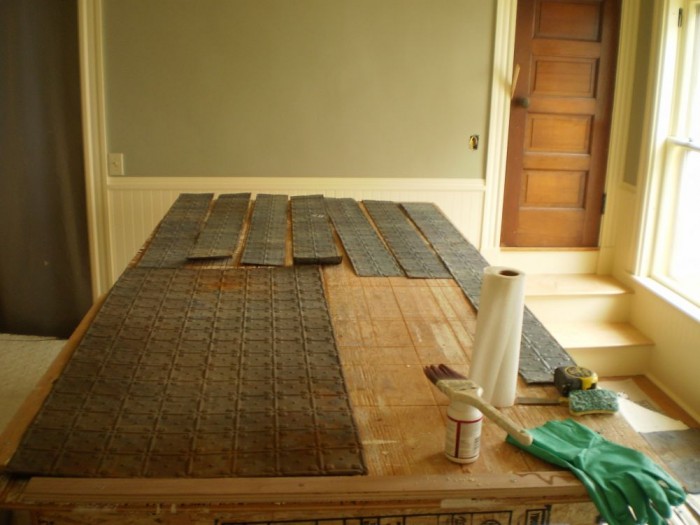
There were some rusty areas from the tin's extended time sequestered in the attic that we had to clean before we could use them. A little naval jelly, fine steel wool and a good rinse did the trick (a stinky but effective process). The tin we took down needed a little work too. We reshaped the edges bent during the removal process and closed up the old nail holes. Patrick improvised by using a nail set, the rounded butt end of a shim and a regular old hammer.
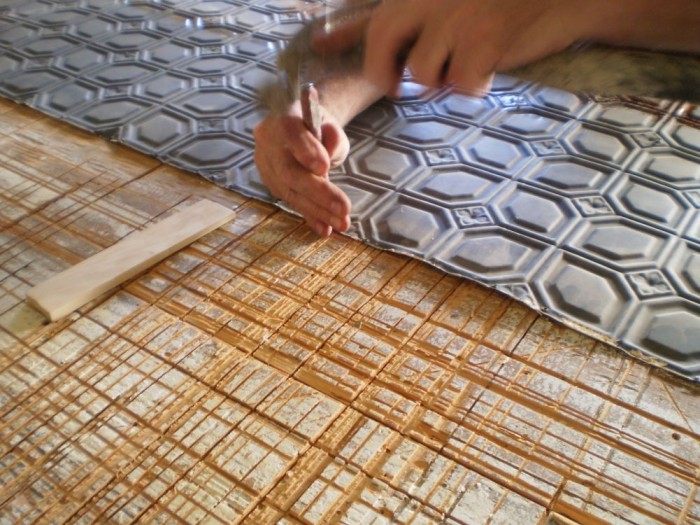
We saved all the old nails to recycle, but hoped that our compressor driven brad nailer would do a more efficient, less tedious job. For the miter cuts we used sharp tin snips (the sharper the better for this task). We also precut holes for the lighting with 3 and 4 inch hole cutters mounted in an electric drill, carefully centering them in the pattern. So, with all the pieces ready to go we roughly laid them out again on our work table to finalize the puzzle.
The original installer had done things backwards. Starting from the outside and working towards the center is a definite no-no; it's hard to control where the field will get cut off. We forgave them though - the installation in the dining room has the quirky local character of a Jack (or Jill) of all trades from 100 years ago. 'He' didn't have the advantage of an internet tutorial.
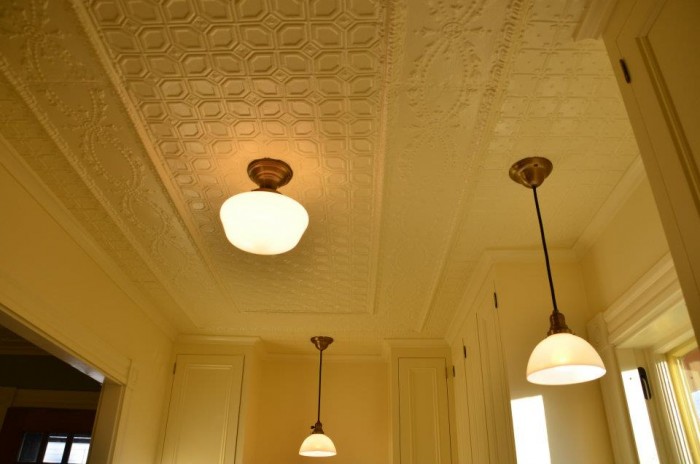
Our approach was more conventional, a process is similar to laying tile. We used chalk lines for reference measuring carefully - starting with the center - working our way out to the filler. We put all the pieces up, nailing in strategic locations - leaving the edges loose where they overlap to finish nailing later. Thankfully the nail gun worked beautifully. To complete the look, we added a wood cove crown molding all the way around to room - tying the walls, cabinets and ceiling together.
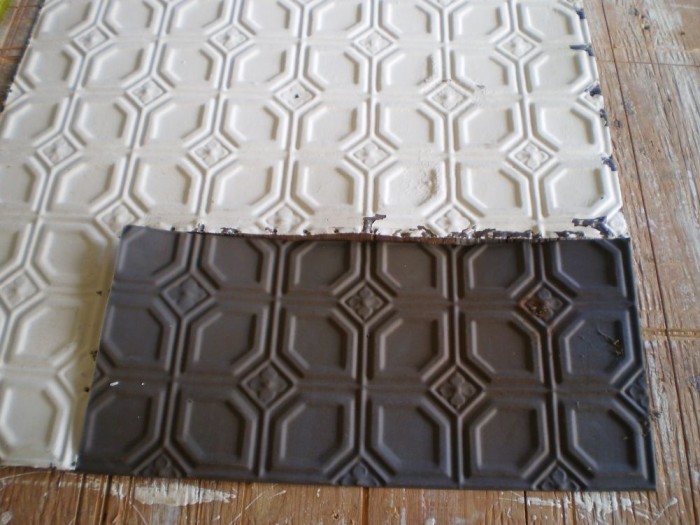
Once everything was in place, the whole thing looked like kind of a mess - some chipped and painted - some bare tin. However, after all was primed caulked and painted (with Benjamin Moore, oil primer and Waterborne Satin Impervo), the transformation was startling. It looked every bit like it had never been taken down. It's amazing what a little tin, tacked to a ceiling, can do for a room.
For more photos of the tin ceiling from start to finish click here.
click here for more photos of the project
For Remnants from the Attic (part 1) click here.
(click photo to view larger image)
|
|
|
|
(comments = 0)
leave a comment

fineartistmade blog
A journal about home design, gardening, art & all things Maine. Read more...
- June 2025
- December 2022
- November 2022
- October 2022
- November 2021
- May 2020
- October 2019
- August 2019
- July 2019
- September 2018
- April 2018
- December 2017
- August 2017
- June 2017
- May 2017
- December 2016
- August 2016
- July 2016
- April 2016
- November 2015
- June 2015
- May 2015
- March 2015
- October 2014
- March 2014
- February 2014
- January 2014
- December 2013
- November 2013
- July 2013
- May 2013
- April 2013
- March 2013
- January 2013
- December 2012
- November 2012
- August 2012
- June 2012
- April 2012
- March 2012
- February 2012
- January 2012
- December 2011
- October 2011
- August 2011
- July 2011
- June 2011
- May 2011
- April 2011
- March 2011
- February 2011
- January 2011
- December 2010
- November 2010
- October 2010
- September 2010
- August 2010
- July 2010
- June 2010
- May 2010
- My Scandinavian Home
- Daytonian in Manhattan
- {frolic!}
- I Married An Irish Farmer
- Smitten Kitchen
- The Curated House
- even*cleveland
- Mary Swenson | a scrapbook
- Ill Seen, Ill Said
- Gross & Daley Photography
- Remodelista
- Abby Goes Design Scouting
- Mint
- the marion house book
- 3191 Miles Apart
- Svatava
- Katy Elliott
- Poppytalk
- Kiosk
- decor8
- KBCULTURE
- Lari Washburn